Contents - Quick Links
The Owner Prefab
In this step of this Unity multiplayer authoritative server tutorial we will create the other two prefabs instantiated by our Spawner script, the Owner and the Proxy prefabs. The Owner prefab is instantiated in the client and should be the one that the player controls, the Proxy is the other players displayed on the clients, we will differentiate these prefabs by adding different components. For this tutorial we will use the same 3d model.
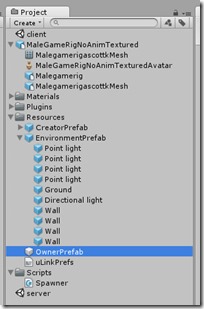
- In the Resources folder create a new empty prefab and name it OwnerPrefab

- Drag and Drop the CreatorPrefab in the empty OwnerPrefab as we can conveniently modify what we already did for the Owner and doing only small changes.
- The peculiarity of the OwnerPrefab is that we will be able to control it, so we must attach a script to read player inputs, let this component be the default Character Controller script from Unity Standard Assets so we need to import it in the project and add to the OwnerPrefab.
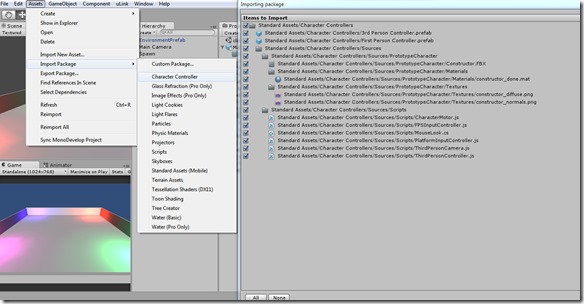
- Click on Assets –> Import Package –> Character Controller and import the files in the project

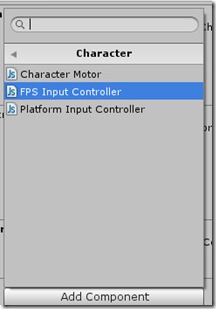
- Add one of the character controllers as a component to the OwnerPrefab, choose between FPS Input Controller or Platform Input Controller as in this authoritative server tutorial we only need it to demonstrate movement synchronization. Select the Replace option if Unity prompts you that another character controller is already present.

- The last thing to modify for the OwnerPrefab is the Center Y property in the Character Controller component, insert the value 1 in the field as it will level the character collider to fit our 3d model and won’t make it fall trough the floor.

The Proxy Prefab
The proxy prefab doesn’t need specific addition :
- In the Resources folder create a new empty prefab and name it ProxyPrefab
- Drag and Drop the CreatorPrefab in the empty ProxyPrefab, all done!
- The last thing to modify for the ProxyPrefab is the Center Y property in the Character Controller component, insert the value 1 in the field.
Assigning the Spawner variables
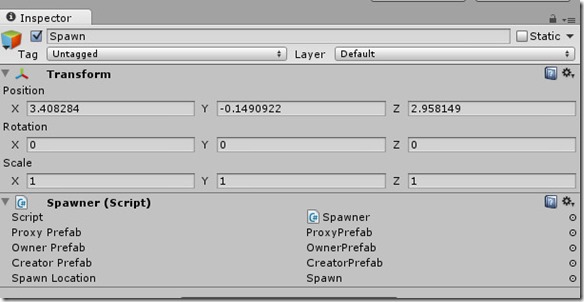
Once all the prefabs are created remember to assign the public variables via drag and drop in the Inspector panel of the Spawn game object in the server scene.


Nice article!
Some details on “Handover” would be cool.
I have tried tow ork on this. Somehow my client is stuck in “Instantiating”. I am able to move it though but without any effect on the server. The model seems to come back to the spawn point after any movement in the client.
Hi ! Do you use the same Unity and uLink versions of this tutorial? I should check and validate this tutorial also with the latest versions. However the issue you refer to is something i recall experiencing while i was coding, the server is overwriting the transform component, please check your project ,every option of the creator owner and proxy objects should match the tutorial.
Meanwhile i will review the tutorial to check for bugs, maybe we can sort out your problem together.
Also after a quick look i added a page with a video of the final result you should get, and a link to the project and compiled files. Carefully check the uLink Network view component options of the Proxy, Owner and Creator gameobjects.
Thanks for your comment !
I could not switch from manual view id to allocated until i had draged the creator prefab into the project folder! just a heads up for anyone who might have the same problem.