Contents - Quick Links
- 1Unity multiplayer tutorial, physics calculations on server
- 2Creating the pong field
- 3Creator and Proxy prefab and adding components
- 4Creating and adding the Inputs components to enable player control
- 5Creating the Server and the Client connection logic
- 6Implementing the ball
- 7Building the game .exe and Unity full project download
Implementing the ball
In last step of this Unity multiplayer tutorial with physics calculated on authoritative server we implemented the Client-server login and motion, we need now the ball to make our player interact and trying to score a goal ! The ball will be controlled by the server and you can reuse the implementation if you need to create NPC or enemies interaction with the player.
We will place the ball directly in the scene and we won’t Instantiate with uLink.Network.Instantiate, so we will need a special setting to set in Network View component we will add.
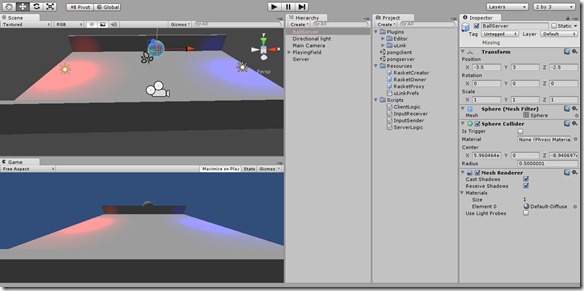
- Open the pongserver scene. Create a Sphere and position it in the middle of the field, name it BallServer.

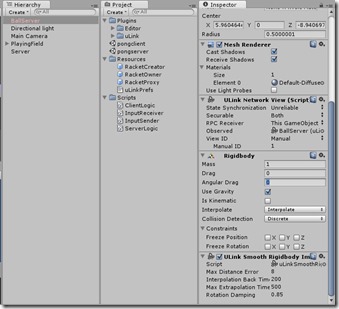
- Select the BallServer game object and add to it as a component a uLink NetworkView. The View ID property of this Network View component should be set to Manual, and the Manual ID set to 1.
- Again in the BallServer game object add as a component the uLinkSmoothRigidbodyImproved utlity script to ( Component->uLink Utilities->Smooth Rigidbody Improved ).
- Drag and Drop the uLink Smooth Rigidbody Improved (Script) title inside the ULink NetworkView Observed property : it will also be added a required RigidBody component, set its angular drag to 0 but dont freeze rotation. Set the Interpolate option to Interpolate.

- Save the pongserver scene. Copy the BallServer game object in the Hierarchy panel by right clicking on it and selecting the Copy option.
- Open the pongclient scene, paste the BallServer game object in the Hierarchy panel by hitting CTRL-V, you can also deactivate the option Use Gravity in the Rigidbody component option as physics and position will be updated by the server.
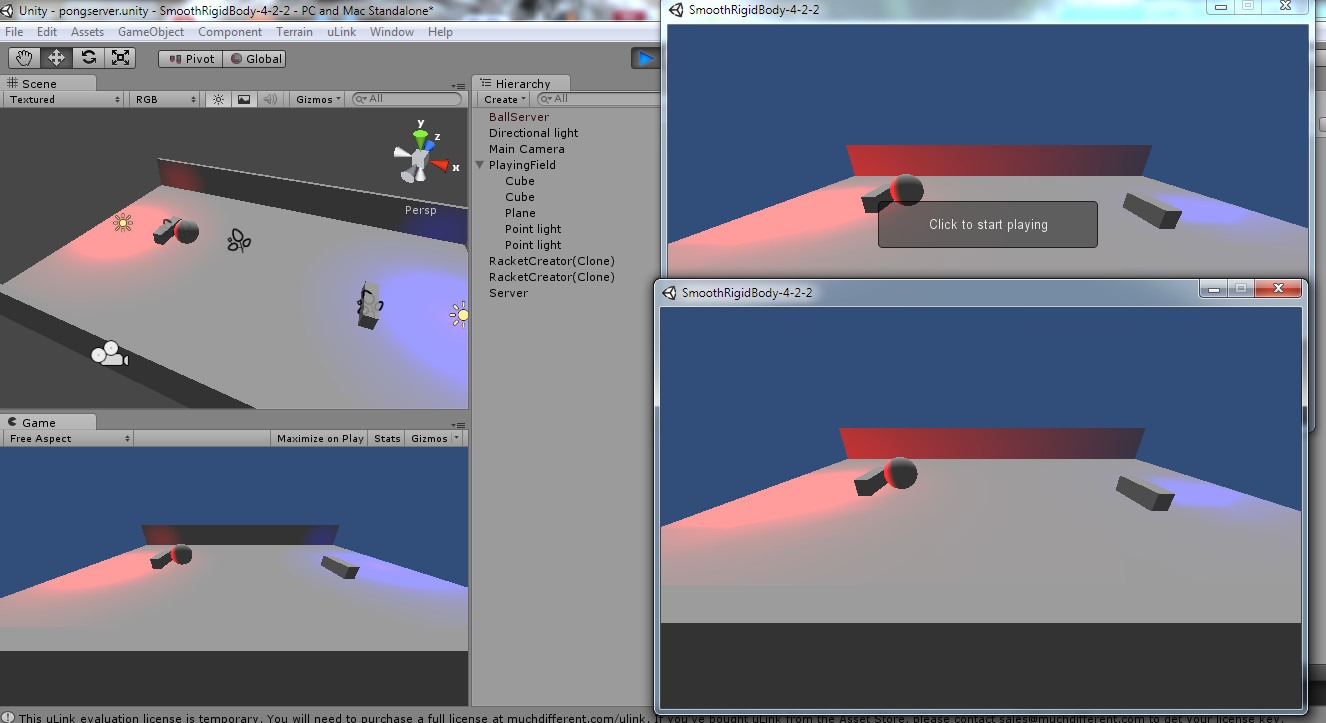
If you now build the clients and the server the ball will appear in both but will not move. We will need to add some forces and logics to make the ball in a constant motion.
Writing the code for the ball physics
The next step of this Unity multiplayer tutorial is to code the actual ball physic that will be managed by the server. We will write a C# script that controls the ball reactions and we will attach it to the BallServer game object in the pongserver scene.
- Open the pongserver scene. Create a new C# script named BallForce and open it in the editor. We want the ball to bounce back when it collides with our rackets and side walls and the ball must maintain a minimum velocity to allow the game to continue.
- Copy the following code in the BallForce C# script, the code is commented to explain what is happening :
[snippet id=’117′]BallForce.cs – Unity multiplayer tutorial physics on server C# script code example download - Add the BallForce C# script as a component to the BallServer gameobject in the pongserver scene.
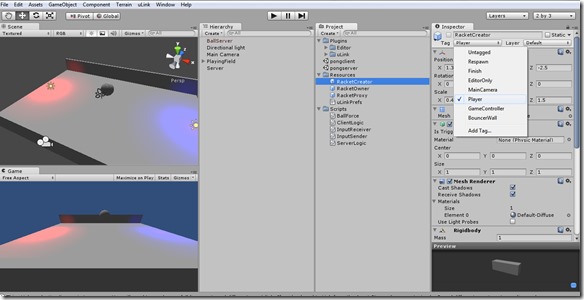
- To make the physics script work you need to tag the RacketOwner RacketProxy and RacketCreator prefabs as Player by selecting them and changing the Tag drop menu. Also create a new tag named BouncerWall and tag with it the side walls of the Playingfield.

You can test the server by pressing play, the ball should drop from the initial position and go in the horizontal direction.


