


Rpg combat system tutorial for Unity with simple state machine
With this Unity combat system tutorial you will be guided into the implementation of a rpg (hack and slash) combat system with the use of a simple state machine that rules the combat logic. Our Unity scene for this combat system tutorial will feature a player character, a typical warrior, and an enemy monster, in a basic environment. Our first task is then setting up the Unity main scene environment and actors, we can conveniently find all the assets we need in the Unity asset store for free !
Setting up the Unity main scene : warrior versus monster
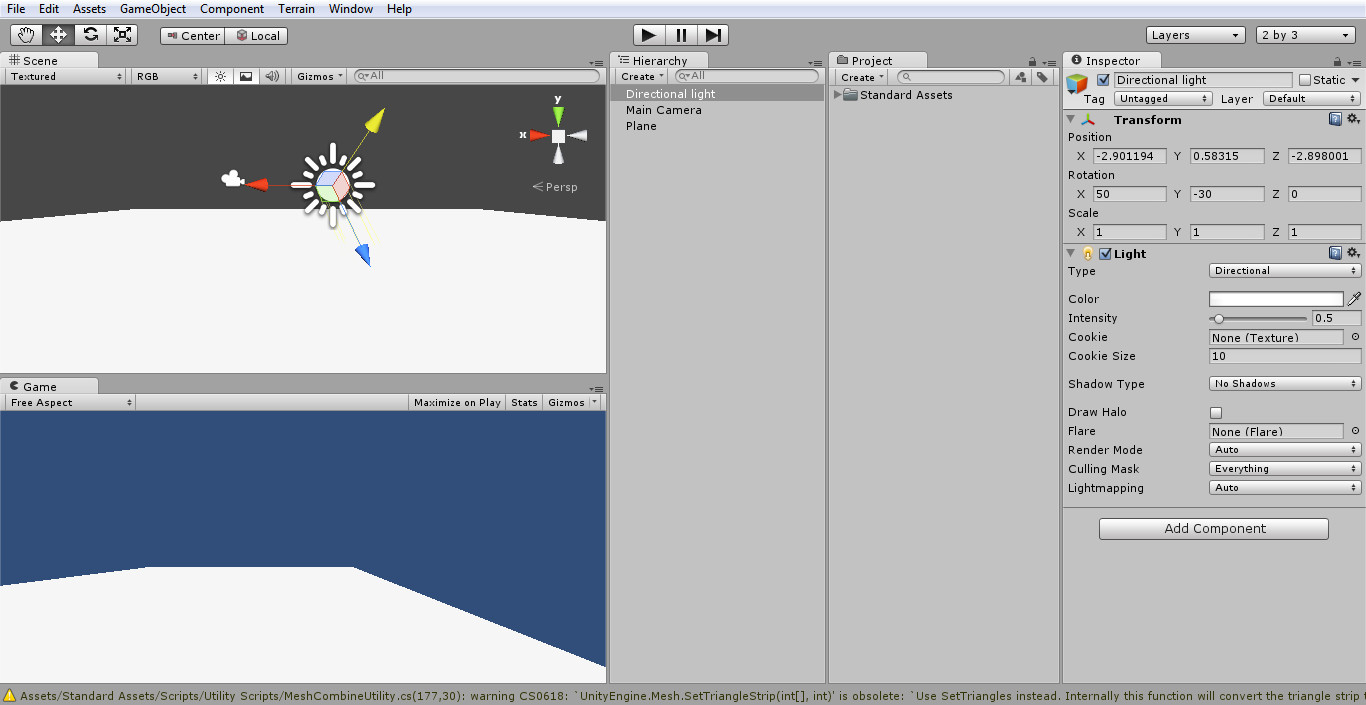
Create a new project in Unity , i am using version 4.1.x free, in the wizard choose to import the Scripts unitypackage. We need a place where our character can move, interact and fight so start with creating a plane by clicking on the menu GameObject>>Create Other>>Plane. A very dark plane isn’t it? Add a light to make everything brighter by using the GameObject>>Create Other>>Directional Light menu. A light will appear and your plane will be shining white, move the light away from the plane or change it’s intensity if you like, you can do this by changing the values in the Inspector tab.
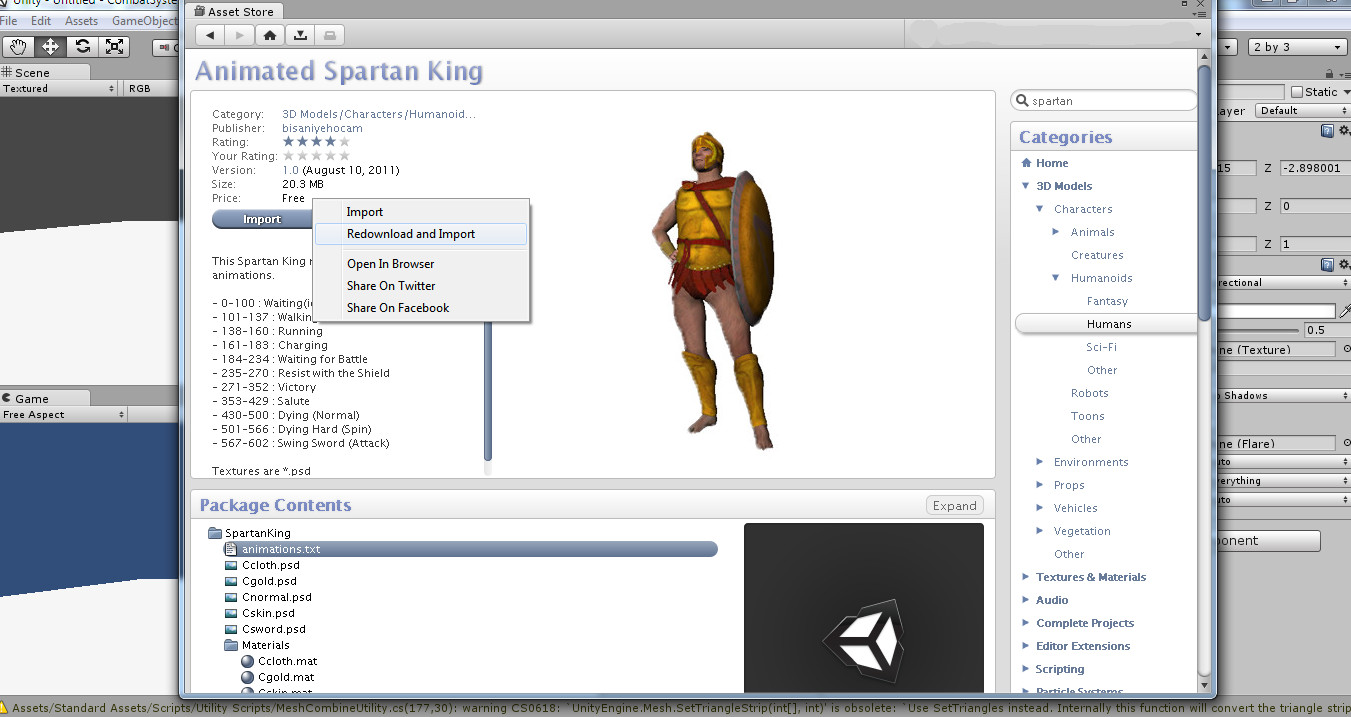
Now we need the warrior and the enemy, we will use the Unity Asset Store to download these free resources and import them into our combat system tutorial Unity project. Click on the menu Window>>Asset Store to browse a very neat Unity resource archive, for the warrior character we will look for a famous free asset that’s named SpartanKing. Type into the Asset Store search box the word spartan and press Enter, you will be redirected to the Animated Spartan King page, to import this free asset into your Unity project just click on the download and import button. When the asset download ends you will be prompted with a box listing all the asset’s resources that you want to import, check that everything is selected and press import, Unity will unpack the resource and you will find the asset into your Project tab in a directory with its name.
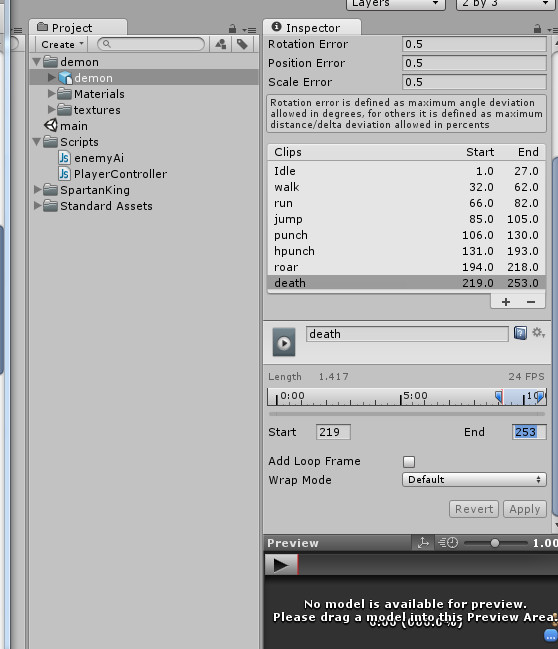
For the enemy monster you have to do the same procedure, this time enter in the Asset Store search box Maze Element Demon and import it in your project! To correctly import the Maze Element demon animation you have to go in the demon folder that appears on import, click on the demon model and select Split animations in the Inspector panel, and add the correct animation with the appropriate keyframe range.

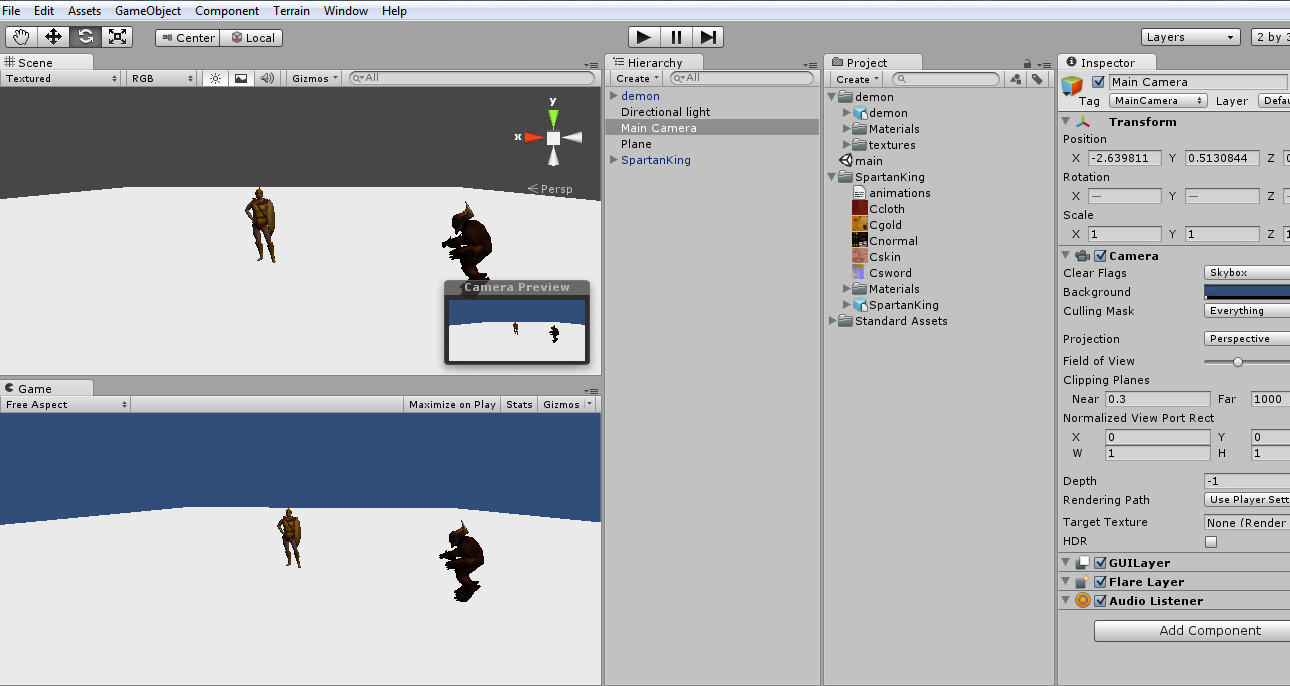
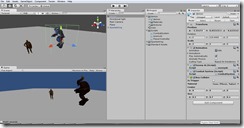
Now place the SpartanKing warrior and the Maze element demon into the scene by drag and drop them from the Project tab into the Scene view. Set the Maze Element Demon Scale components to 2 to make it…bigger ! Your Scene view should look like the following picture.
Controlling our character and giving our enemy some life
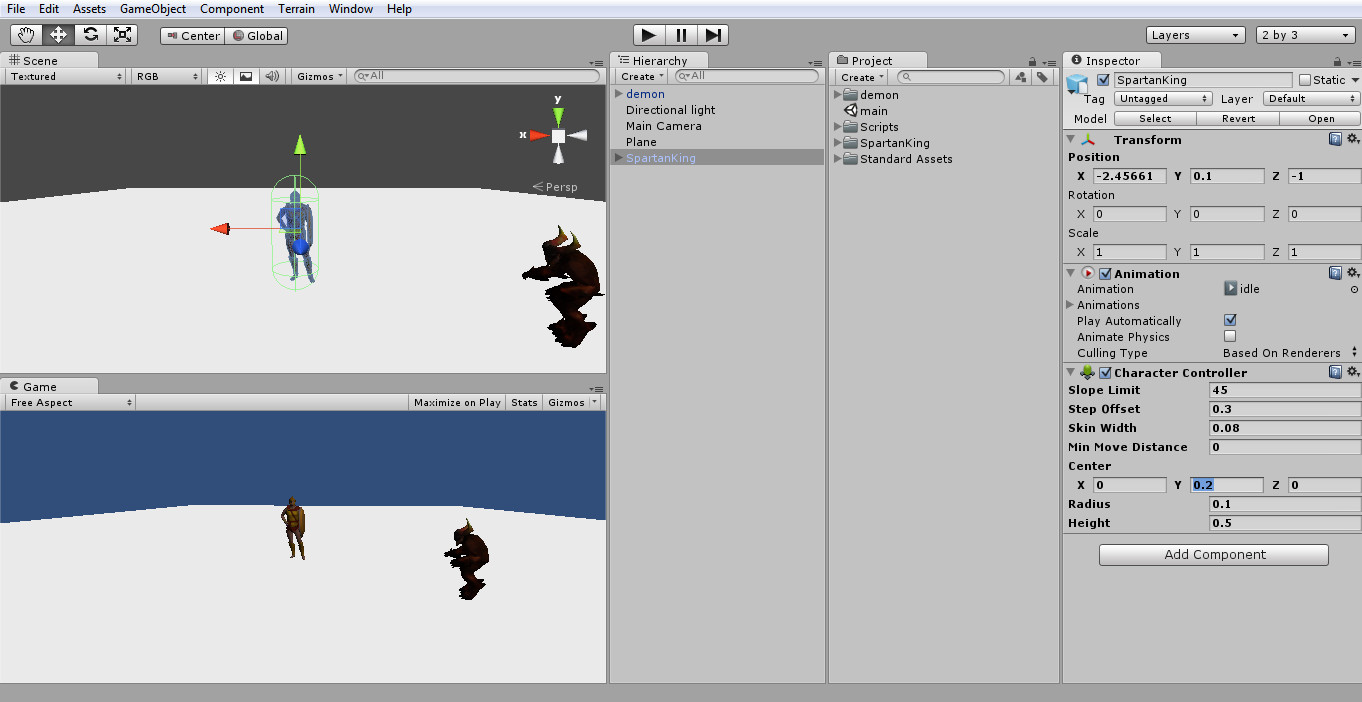
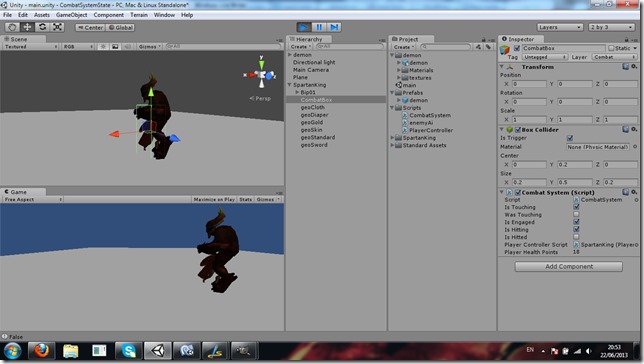
In this part of this Unity rpg combat system tutorial we will make the warrior character controllable with a classic WASD keyboard control and we will write a script to give the enemy demon a simple artificial intelligence, a very basic task that will make the NPC play an attack animation after a random amount of time. Select the SpartanKing gameobject in the Hierarchy panel and click Component>>Physics>>Character Controller, a green wired capsule will appear around our warrior. This component will give to SpartanKing the ability to collide with other gameobjects and to stand on the plane and not falling trough it, so it should embrace the boundaries of our 3d model. In the Inspector panel, with SpartanKing object still selected, you can change the Character Controller component properties values to make it fit our warrior model, select 0.1 for Radius, 0.5 for Height and 0.25 for the Center Y, the green capsule should fit the model now.
Now in the Project panel create a folder named Scripts, and inside this folder create a new javascript script called PlayerController. Since character controlling is out of the scope of this Unity rpg combat system tutorial i will give you a working script from one of my previous tutorials. Click the following link to download PlayerController Script for SpartanKing. Put the Player Controller script in the scripts directory and add it to the SpartanKing gameobject as a component with Component>>Scripts>>Player Controller. The script is tailored for SpartanKing asset, you can move around with WASD, jump with space and attach with left mouse click. At this point of this Unity rpg combat system tutorial we should give our enemy a simple ai script which makes the demon attack every random amount of time.
Create a new javascript file in the Scripts folder named enemyAi, open it with MonoDevelop editor and paste the following code :
[javascript]
#pragma strict
static var isAttacking : boolean = false ;
static var isEngaged : boolean = false ;
private var playAnim : boolean = true ;
function Start () {
}
function Update () {
if (playAnim) //check if attack animation was played
WaitSeconds(); //wait random seconds for animation
}
function WaitSeconds(){
playAnim = false;
var randomWait = Random.Range(0, 6);
print (“Wait” + randomWait + ” seconds”); //debug
yield WaitForSeconds(randomWait); //Wait a random amount of time
isAttacking = true ; //set isAttacking state to true
animation.Play(“punch”); //play attack animation
Debug.Log(“isEngaged : ” + isEngaged);
yield WaitForSeconds(animation[“punch”].length) ;//wait for animation duration
isAttacking = false ;//set isAttacking state to false
playAnim = true ; // detect when anim is complete
}
[/javascript]
Select the demon gameobject and add this script as a component by clicking Component>>Scripts>>Enemy Ai the enemy demon should now play an attack animation every random time interval ranging 6 seconds max.
With our scene ready and actors set you should definitively move to Rpg combat system tutorial for Unity with simple state machine – part 2 to start implementing the combat system code !
NEXT : Rpg combat system tutorial for Unity with simple state machine – part 2
Related posts:
 Rpg combat system tutorial for Unity with simple state machine – part 4
 Rpg combat system tutorial for Unity with simple state machine – part 3
 Rpg combat system tutorial for Unity with simple state machine – part 2
 UNITY RPG COMBAT SYSTEM TUTORIAL WITH STATE MACHINE JAVASCRIPT FULL CODE DOWNLOAD EXAMPLES
1 thought on “Rpg combat system tutorial for Unity with simple state machine – part 1”