Rpg combat system tutorial for Unity with simple state machine – part 2
This part of this rpg combat system tutorial for Unity will show you how to implement a simple rpg combat system in your game. Let’s take a look to the enemyAi script code introduced in part 1 of this rpg combat system for Unity tutorial :
1: #pragma strict
2:
static
var isAttacking : boolean = false ;
3: private var playAnim : boolean = true ;
4:
5: function Start () {
6: }
7:
8: function Update () {
9: if (playAnim) //check if attack animation was played
10: WaitSeconds(); //wait random seconds for animation
11: }
12:
13: function WaitSeconds(){
14: playAnim = false;
15: var randomWait = Random.Range(0, 6);
16: print ("Wait" + randomWait + " seconds"); //debug
17: yield WaitForSeconds(randomWait); //Wait a random amount of time
18: isAttacking = true ; //set isAttacking state to true
19: animation.Play("punch"); //play attack animation
20: yield WaitForSeconds(animation["punch"].length) ;//wait for animation duration
21: isAttacking = false ;//set isAttacking state to false
22: playAnim = true ; // detect when anim is complete
23: }
As you can see in this Unity javascript code snippet a “state” is introduced, on line 18 when the attack animation starts to play the isAttacking boolean variable is changed to true until the animation is completed. This simple value tells us when our enemy is attacking, giving us the right time frame where check for collision with the player character to see if the enemy hits him.
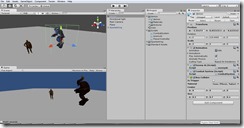
We need to add a Box Collider to the enemy demon to create an area around the model where we can check for collisions with the player character, select the demon and click on Component>>Physics>>Box Collider.A green wired box should appear around the demon, but a little too big, set the Box Collider Scale properties in the inspector panel to make the collider fit the model. We will not use this collider in this rpg combat system tutorial, but it will grant collision detection with the floor for the demon gameobject in case you will add a rigidbody component for your own purpose. 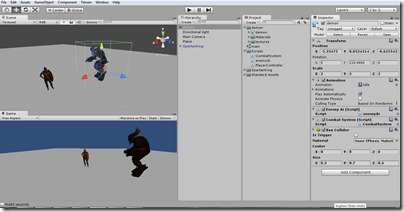
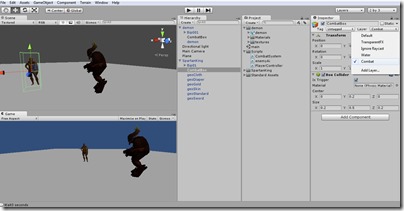
CombatBox Box Collider for combat system on every fighter
Now we will write a script that controls the rpg combat system, click on Create>>Javascript in the Project panel, name it CombatSystem and save it in the Scripts folder. To make use of Unity functions that use collision detection between a collider/rigidbody we need to add to our player character SpartanKing a rigidbody component since collision events are only sent if one of the colliders also has a non-kinematic rigidbody attached.
We need to add a Box Collider component that we will use to check for collisions with the enemy model, since our SpartanKing already has a Character Controller component assigned (That includes a sort of special Collider) it is good practice to create a new empty Gameobject, child of SpartanKing and add the Box Collider component to this empty Gameobject. Select Gameobject>>Create Empty and rename it to CombatBox then drag and drop it onto the SpartanKing gameobject in the Hierarchy panel.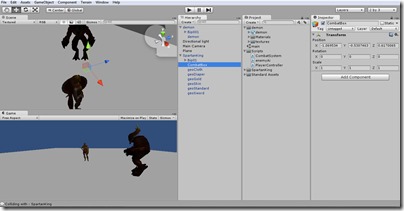 Now CombatBox is a child of SpartanKing, we need to center it respect to the player model, to do so you can set its X,Y,Z Position to 0, since now the position is relative to its parent ojbect. Then proceed to add a Box Collider component to the CombatBox gameobject as seen before, and set its Scale and Position properties to make the collider fit the model, but not as tight as the Character Controller collider, the CombatBox should be larger. Then make sure to tick the IsTrigger property as we need this collider to be “transparent” and not solid.
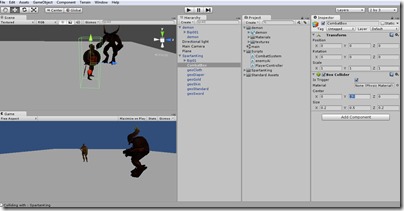
We need to give to the demon a similar CombatBox a child gameobject, we can accomplish this task with a simple copy & paste. Select the CombatBox gameobject child of SpartanKing, right click and select Copy. Then select the demon gameobject in the Hierarchy panel, right click and paste the CombatBox component, now our demon gameobject should have a child gameobject named CombatBox with a Box Collider component attached. Problem is that the green wired box collider is the same copied thus it is around the SpartanKing model and is not big as we need to fit the demon model. You need to set the relative position properties in the CombatBox’s Box Collider component to zero, as it is a child of demon this will center it on the model, then proceed to modify the Center and Size properties to make the Box Collider loosely fit the demon model.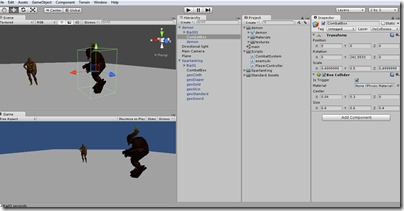
In the following step of this Unity combat system tutorial we will introduce a Unity feature named Layered Physics System, that is a simple system to check for collision only between objects that belong to specific layers, thus making collision detection for our combat system less complex since we can ignore all the collisions with the Environment and only focus on the player and the enemy characters.
A Layer to rule them all, or to avoid unwanted triggers !
The Layered Physics System allows us to restrict collision between gameobjects without interfering with other physics objects, first we need to create a new Layer and then assign to it the CombatBox gameobjects with Box Colliders we created children of SpartanKing and demon gameobjects. Select the SpartanKing gameobject, in the Inspector panel you should see in the top right a dropdown menu named Layer, click on it and select the last option Create a New layer. A list of existing built-in layer will appear, all you have to do is select an empty User Layer and give it a name, name it Combat.
Now we need to assign the CombatBox gameobjects of SpartanKing and demon to this Combat Layer, select the CombatBox gameobject and from the dropdown menu check the Combat Layer option, do this for both the CombatBox child of SpartanKing and child of demon.
Now we are ready to introduce the actual combat system code in the Rpg combat system tutorial for Unity with simple state machine – part 3
PREVIOUS : Rpg combat system tutorial for Unity with simple state machine – part 1
NEXT : Rpg combat system tutorial for Unity with simple state machine – part 3


2 thoughts on “Rpg combat system tutorial for Unity with simple state machine – part 2”